2022-06-07 Update – I created a video on how to replace the LCD and used a different method of disassembly. This method makes it easier to plugin the ribbon cable into the LCD board.
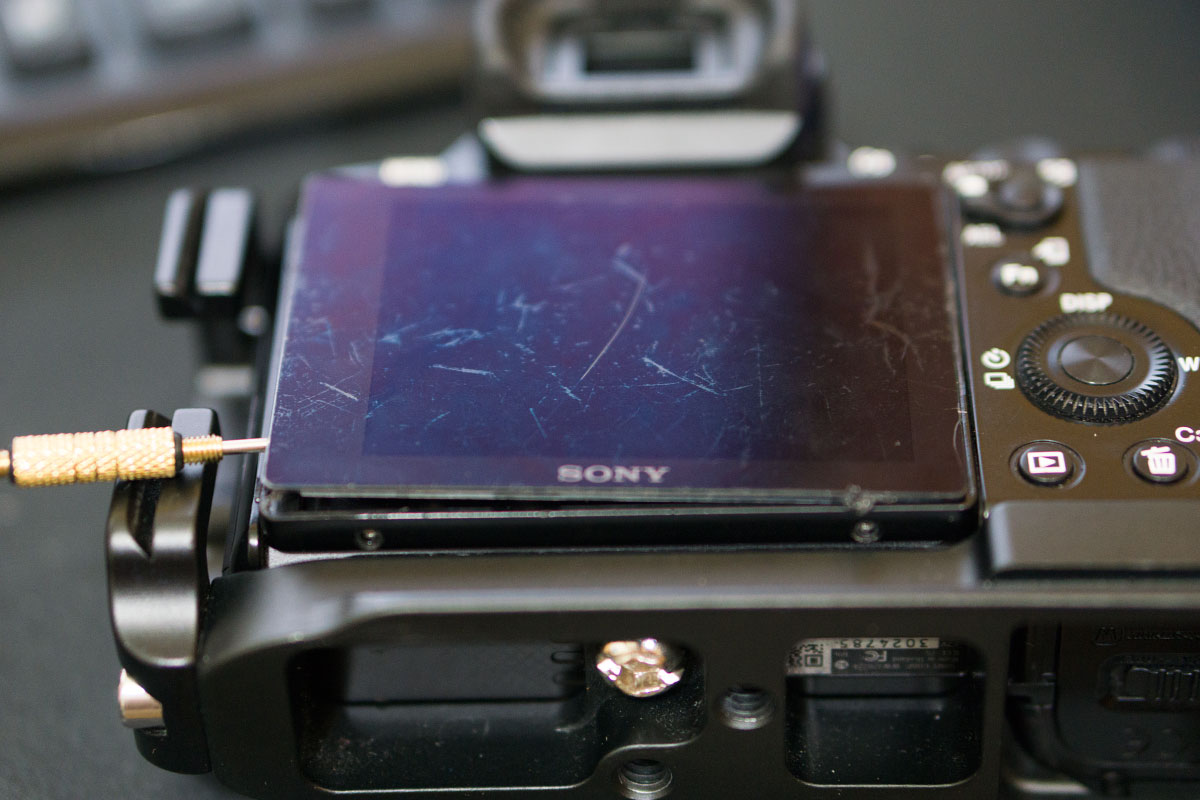
The screen on my Sony A7S was scratched and had some dead pixels, so it was time to replace it. Replacing it is very tricky. I do not recommend doing this yourself if your not comfortable with opening up your camera.
I am not a professional. I’m just a photographer that wanted to fix the screen myself. This is a general guide on how to do it based on replacing and reading a forum. I am not responsible if it doesn’t work or gets damaged.
What you will need:
LCD Replacement (Same for all three cameras)
Phillips #00 Screwdriver
Double Sided Tape
Step 1:
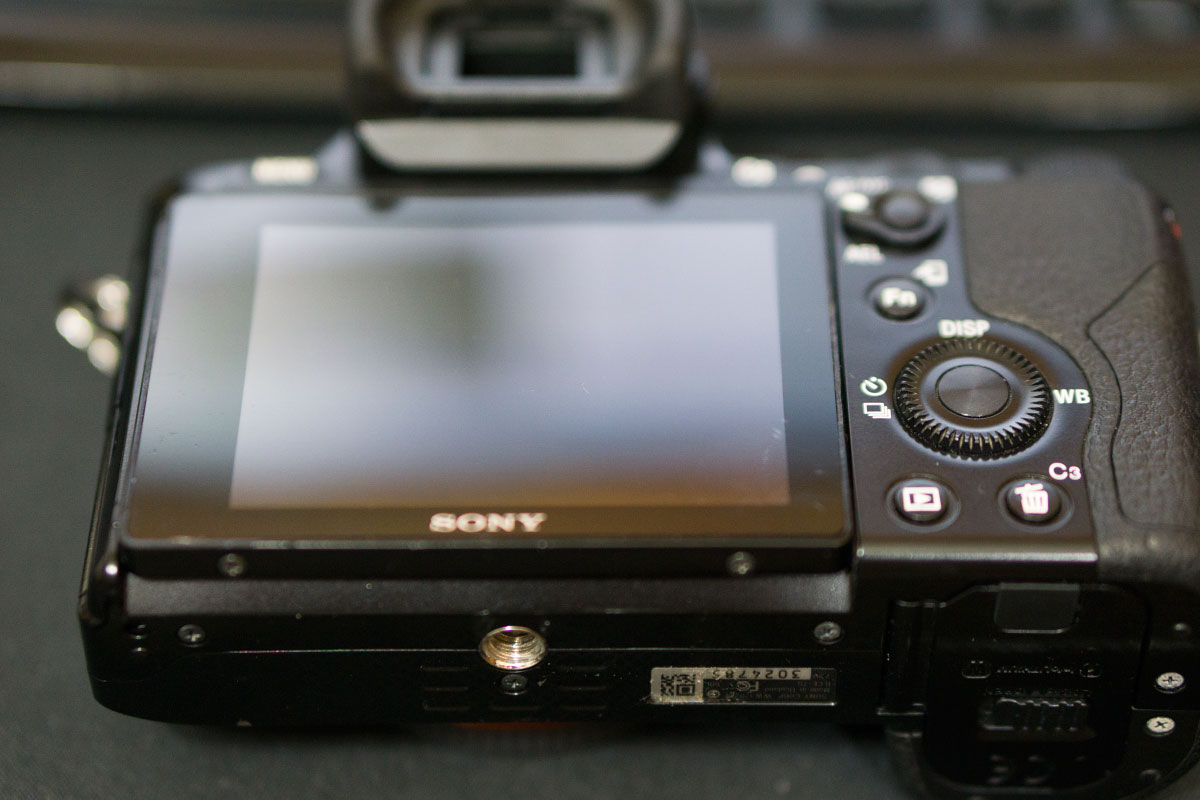
Remove the bottom and rear screws from the screen.

Step 2:
Pry up the LCD using a spudger or flat small screwdriver. The LCD is held by an adhesive.

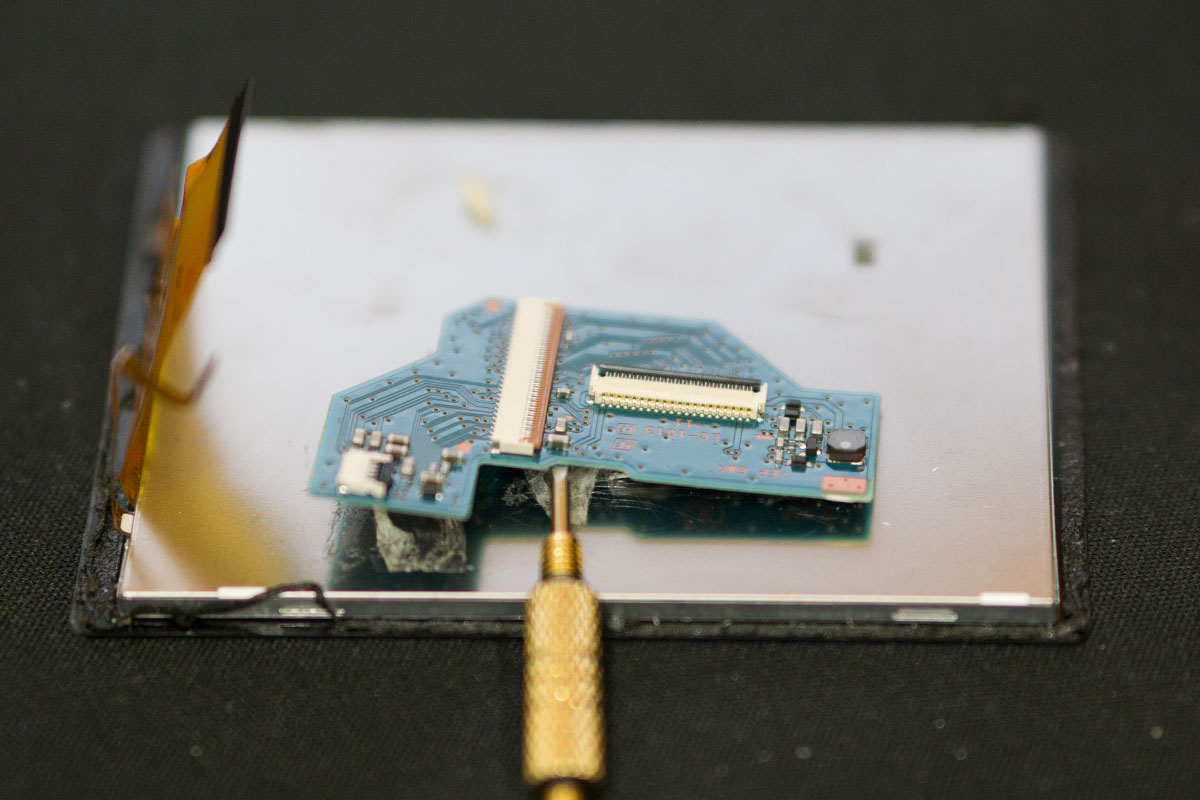
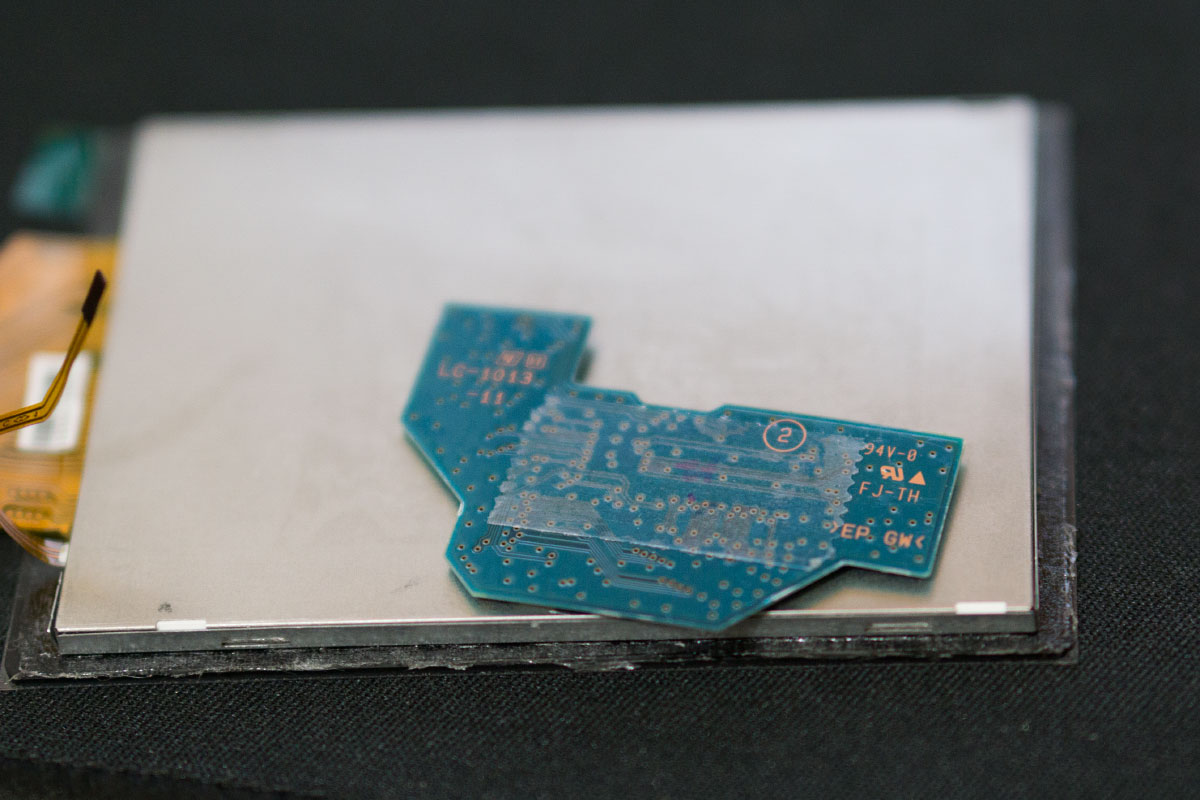
Step 3:
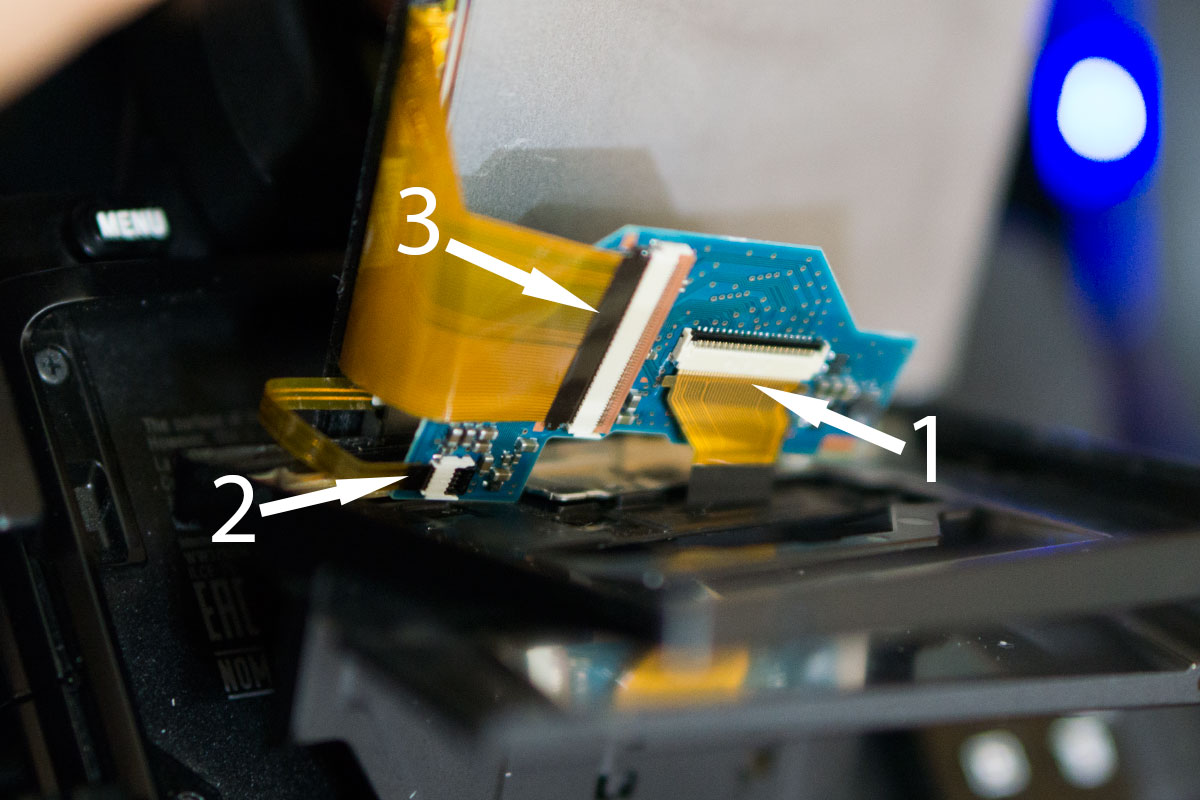
Carefully disconnect the PCB ribbon going from the LCD to the camera and remove the LCD. Remove the two ribbons going from the LCD to the PCB. Pry up the PCB from the back of the LCD using a spudger or screwdriver. It is held down by some adhesive. Apply a piece of double sided tape to the PCB after you have removed it.
Step 4:
Connect the ribbon from the camera to the PCB.
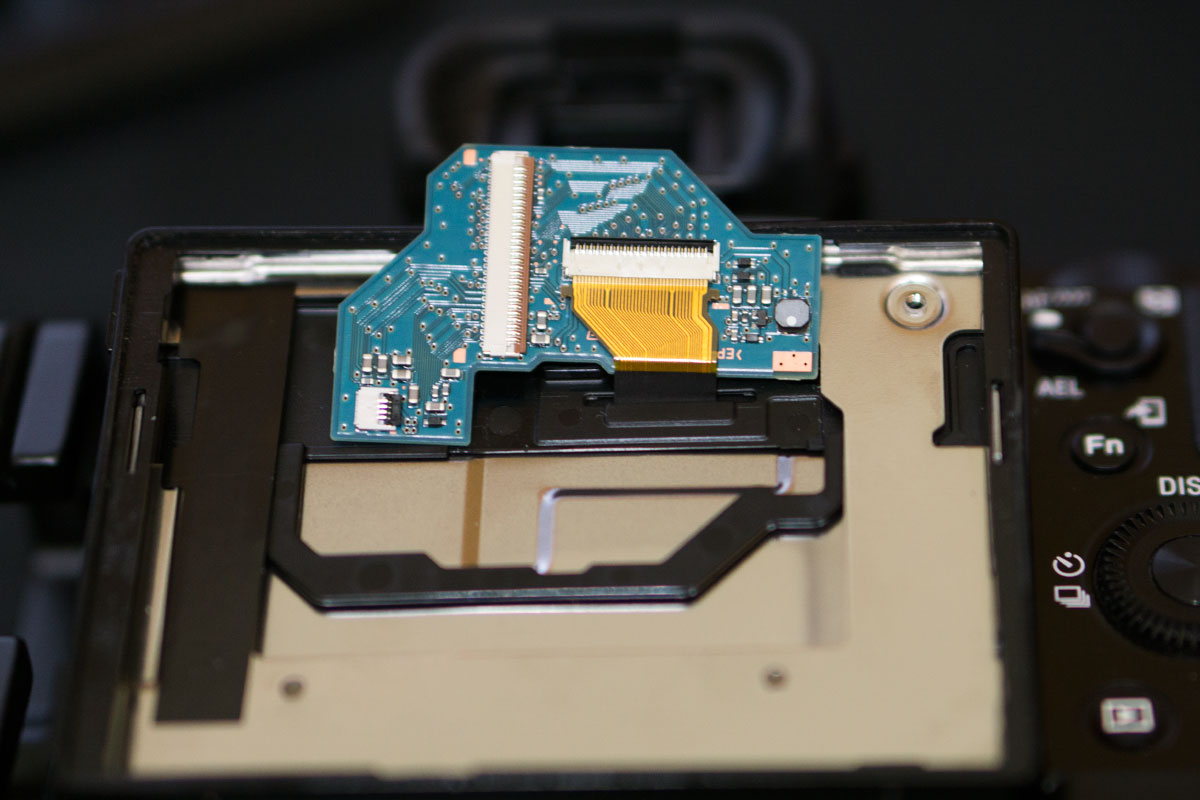
Step 5:
Connect the narrow ribbon from the LCD to the PCB and then the wide one last. This is the tricky part because it is hard to get all three ribbons plugged in. You may want to use tweezers to help plug in the ribbons.
Step 6:
Fold the widest ribbon back and push it all the way to accurately position the PCB and stick it to the back of the LCD. Push the LCD in so that the adhesive sticks to the plastic bezel. Put the 4 screws back in and you should be finished.
What sticky tape did you use and where would I get the thin stuff. I have my LCD off right now and all I need is more double sided tape.
I used Scotch double sided tape for the PCB and ATG tape do add more adhesive to the edge of the LCD.
Thanks for your guide. I think I did something wrong and now both my old and new screen doesn’t turn on… maybe I fried the PCB? I double checked if the cables were connected correctly. I hope it’s easy to repair.
I had the same problem. Make sure that the cables are in all the way. For me it was the largest one that wasn’t in all the way.
Hi, I went through everything a couple of times and even checked that the cables were in as far as they could go but still no power. I’m really stuck now. Any help would be great.
All I can say is to make sure that the cables are in all the way. Maybe it’s getting unplugged when finishing the installation? Try it with all the components out. If that doesn’t work, I would seek the help of a professional.
Hello and thank you for a wonderful explanation on this LCD swap. I wish I would have discovered it before I damaged my main LCD ribbon. As I did not would you have any suggestions as to where I could purchase a complete LCD assembly with a new main ribbon?
Thanks again for the wonderful right up!
Regards
Dave
Here’s one from ebay for the Sony A7/A7R/A7S: http://www.ebay.com/itm/LCD-DISPLAY-SCREEN-For-Sony-A7-WITH-BACKLIGHT-/371603888013
For $24, I’d guess it would be a lot easier just to remove the whole LCD assembly and replace it with this. I’m almost tempted to buy one and mothball it…
Where did you see the whole LCD assembly?
Hey! Do you know if the sony A7 uses the same screen as the a6300?
It uses a different screen.
How do you pry up the PCB from the LCD screen? I’ve used the smallest of flat screwdrivers and I feel like I’m just scratching the PCB and wearing out the sides of it. The adhesive is stronger than I realized.. Can you give some tips? Thanks!
Maybe try a plastic scraper.
After quite some time playing around, I finally got this to work. Many thanks for this helpful tutorial
Hi Folks. First, thanks for the tutorial. I took me about an hour to get through this.
I can confirm this is quiet “tricky”. I would go even further and call it “dangerous”. You can easily damage several parts irreversibly: The 3 connectors, the connector board itself, the ribbons, the plastic frame and last but not least the small black part containing the snap-in-sprig/gib whatever this can be called.
This plastic part is placed between the back plates and the frame. There is a very tiny spot on that which is needed to be fixed, if it brakes your display won´t snap in anymore and you probably won´t get that 1-cent part anywhere again. At least this is not critical.
I want to suggest a slightly different method now:
1) Do NOT remove the screws!
2) Push out the display very carefully with a plastic wedge. Start in the middles scratching the glue out and stretching the frame.
3) As soon as the display is not attached to the frame anymore push it so that you can look in between the display and back where you can see the connected ribbons and the board.
3) Now search some plastic as flat as a paper but still as stable as possible. I took a transparent box for computer parts. Very carefully intrude in the gap between board and back to free the board by sliding from side to side etc..
4) As soon as you have managed to free the board the tension goes away and it is possible to remove the ribbons. (At that stage take a look at the adhesive and decide if you want to replace it with a fresh one or just leave it. Maybe the old one is still good enough.)
5) Start with the widest, then the small one. Then turn the board upside down carefully and remove the last one.
6) Now connect the new display vice versa. The first ribbon can be pushed in well by using the knick. Be sure to insert really tight. Then the small one and in the end the wide one. All three should be done without big efforts, at least for me no problem, the most easy part…..The board does not have to be in the end position while doing it.
7) Now you have to bring the board into the right position, if this is not done correctly the display will not engage as it should and there will be gaps here and there. That was my problem! I found out that the position was good enough when I pulled the board in way that the wide ribbon was lying tense and tight on the LCD backside.
8) Now engage and it´s done….. Maybe!!! If you are not so lucky the LCD does not fit as close as it should. I used glue to fix it…..
Important: If you remove the screws there is a chance the described plastic part will fall out and it´s quiet hard to place it back again. Also in this tutorial a hint is missing that the frame has to be put back in first before reattaching the LCD.
Something like that… My 7S is now near the heater to let the glue dry. Tomorrow I´ll see how close it fits. Hopefully it´s all right. Not sure if I would have done that if I would have known how difficult this can get. Otherwise, now I know how it works and would do it again much faster and without issues.
Hi, how do you remove the ribbons? is there a latch or pull with tweezers?
What is the “knick”? “5) Start with the widest, then the small one. Then turn the board upside down carefully and remove the last one.
6) Now connect the new display vice versa. The first ribbon can be pushed in well by using the knick. Be sure to insert really tight. Then the small one and in the end the wide one. All three should be done without big efforts, at “
Hi do the replacement LCD come with glue on the edges?
i cracked a LCD. Repair is more than $200.
thanks for your tutorial.
What about the reservations that in the comment written by Max?
step 5 is really tricky, took me almost an hour to get all 3 pins in firmly. never repair anything myself, thanks for the tutorial bro, cheers
Did the new LCD come with the Anit Glare coating?
Thank you for the fantast detailed information, the only question I have is
My bracket that holds the screen is broke and tilt mechanism is bend, where can I get one, any clue?
ribbon #1 does not stay in no matter what i do.
I am also having trouble with ribbon 1. This has been sitting on my work bench for weeks now because I am stuck on this part. Any insight into this step would be greatly appreciated!
I finally figured out what made getting the ribbon cables in place. On each port there is a flip up notch that allows easier insertion. once the cable is in place, flip that down with some flat tweezers and it is much easier to keep in place.
Hey ! Thanks a lot for this super nice tuto. I’m about to order a LCD.
Shoud it arrive with adesive already installed on it? how is it supposed to glue the body? thats the only part that i’m not sure about…
For tape, which should i buy if needed?
thanks a lot !!!
Does anyone know where i can buy a pcb for a A7rii mine is fried.
The LCD is attached with a laminated double-stick copper gasket that doesn’t come with the replacement LCD. What’s the part number and source for this?
The two wide FCB connectors have flip-up retainers that are light gray, on the side opposite from the FCB entry. They rubber and twist easily. See the photo.
I’d probably opt for the peeling the plastic protector if the LCD isn’t damaged.
For anyone replacing an A7ii lcd screen, I spent about 3 hours, and I finally figured it out. The steps are similar:
1. Remove the 4 screws.
2. Remove the lcd screen.
3. you will see a PCB board with 2 ribbons, one attaches to the LCD screen, the other attaches to the camera. The PCB board will be taped down, so use a little bit of force to pry it up. Remove both ribbons.
4. Take your new LCD screen, attach the ribbon to the PCB board, and put everything back together (push the LCD screen down, and put in the 4 screws you removed in step 1.)
5. This is the tricky part, on the back of the LCD, there are the 2 screws you removed and put back. In between them is this small black metal piece. Take a small screwdriver and push it out. This youtube video shows it at 10:20 https://www.youtube.com/watch?v=Jx6aOKJWydk
6. once you remove the cover, you can reattach the cable from the camera to the PCB board.
7. Power on and you’re done! If it doesn’t work, make sure the ribbons are properly attached. Multiple times I thought I was done, and it turned out the ribbons weren’t all the way in.
Good luck!
I replaced the ribbon to camera and the screen but wouldn’t turn on . On closer inspection the pcb board looks really knackered so have ordered a new pcb . What a fiddly job but my alternative is something like £600 repair costs.
Thanks for this tutorial and all the tips on replacing the LCD displas on an Alpha7. I was able to use it to replace the damaged display on my A7 myself and save the high repair costs.
However, I would like to give one more hint:
It is very important to open the latches on the flex cable receptacles before pulling out the flex cables and to keep them open before inserting the flex cables back into the receptacle. Another friend had already pointed this out as well. The latches are located opposite the flex cable insertion slots. They are narrow strips of colored plastic and they can be ‘flipped up’ with a filigree tool.