Astro photos are one of the hardest to process because you can’t see all the colors and details of the night sky. It is also very hard to get clean images from a single frame unless you have a full-frame camera and a fast lens. With stacking, you can combine multiple frames to reduce noise by averaging the opacity across the layers. When you are not shooting the galactic center, Photoshop will not be able to align the images correctly because the stars are moving in different directions. This is a situation in which you would have to manually align the layers yourself.
Before post production, take multiple frames on a steady tripod using a shutter remote. This will ensure that the images are absolutely aligned with one another. Make sure you choose a shutter speed quick enough to prevent star trails. The ISO does not matter too much because noise averaging will eliminate most of it. Shoot at least five frames for best results.
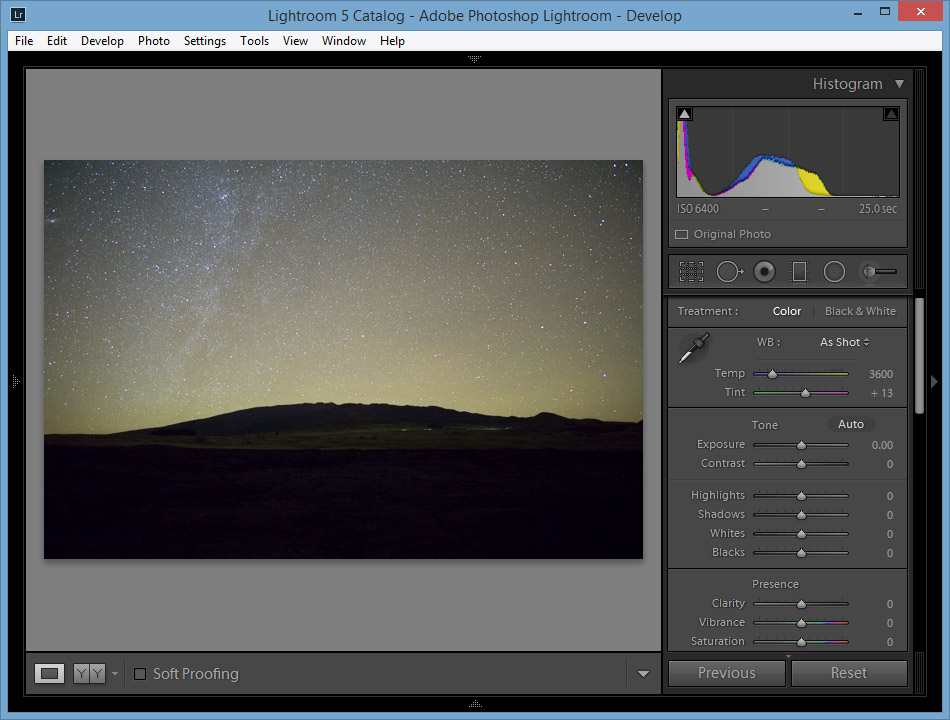
I start off with editing the RAW files in Camera Raw or Lightroom.
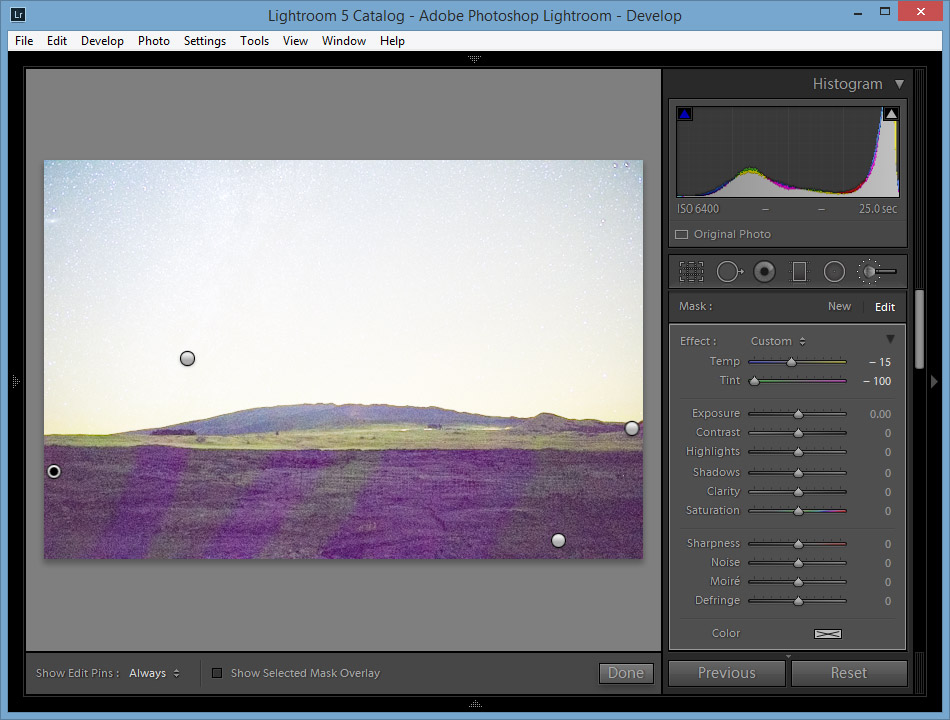
I increase the overall exposure until I can see the color cast in the shadows. I use adjustment brushes with -100 tint to eliminate the red color cast (notice the stripes where I did not brush). I also brush the Milky Way with a brush with increased clarity and contrast. This will make the Milky Way more prominent in the sky.
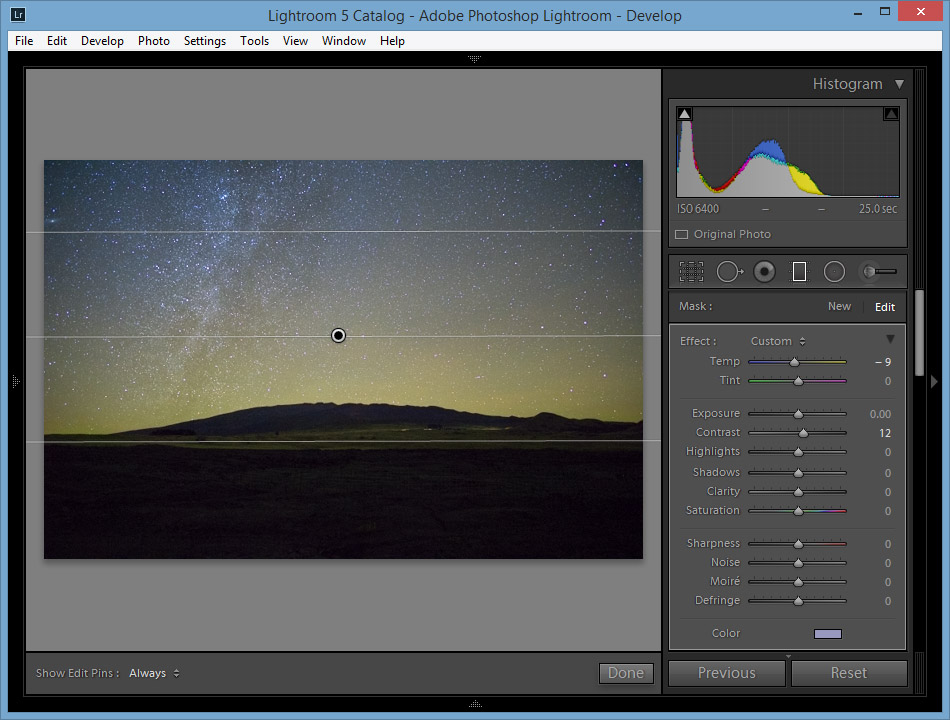
I use a graduated filter on the top portion of the sky bring out a cooler color. The filter is filled with a light blue color and a decreased temperature.
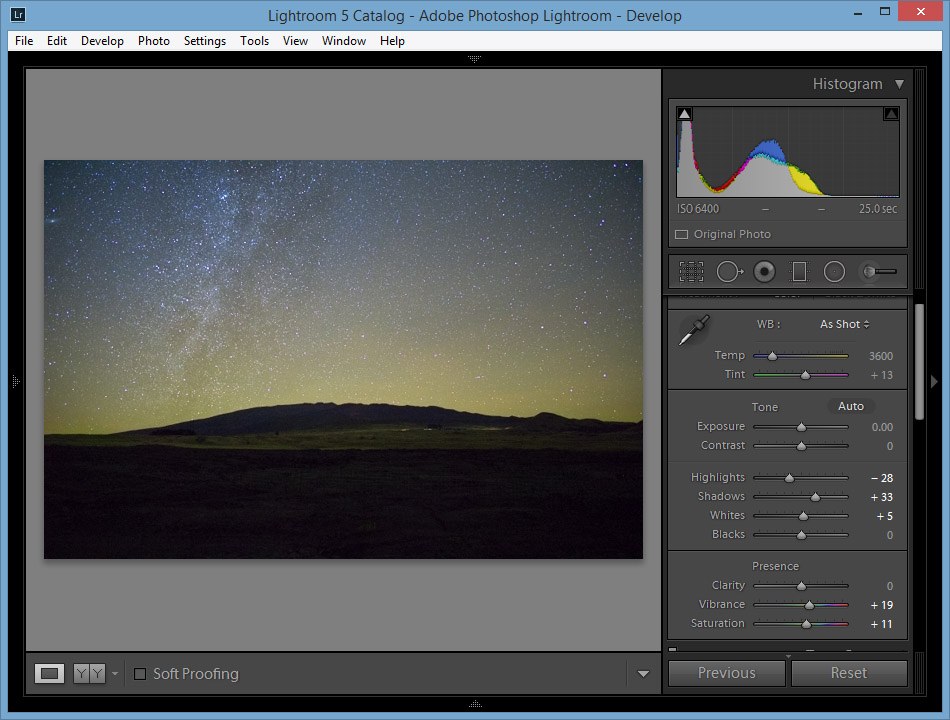
My basic adjustments reduce the highlights and increase the shadows. I also increase the vibrance and saturation to bring out more color in the overall scene. After that, I synchronize all the layers by copying and pasting the metadata to the other frames.
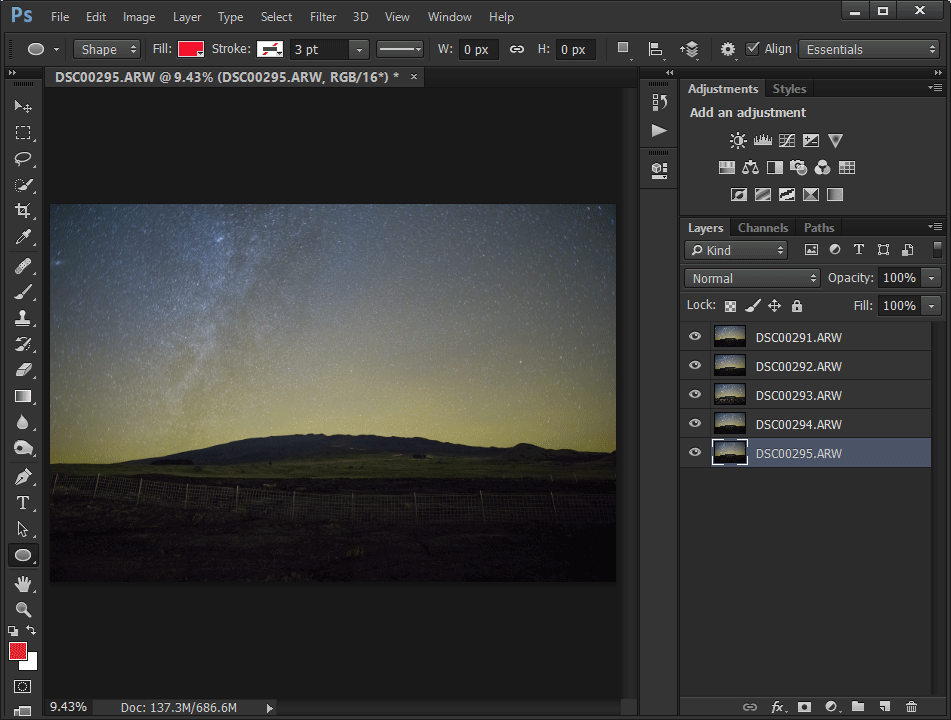
I right click the selected files in Lightroom and open them as layers in Photoshop. This is called a stack. After that, I noise average the photos by changing the opacity of each layer. This is calculated by this equation: Layer Opacity = 1/# of Layers Below + 1. Doing this greatly reduces the noise without losing detail.
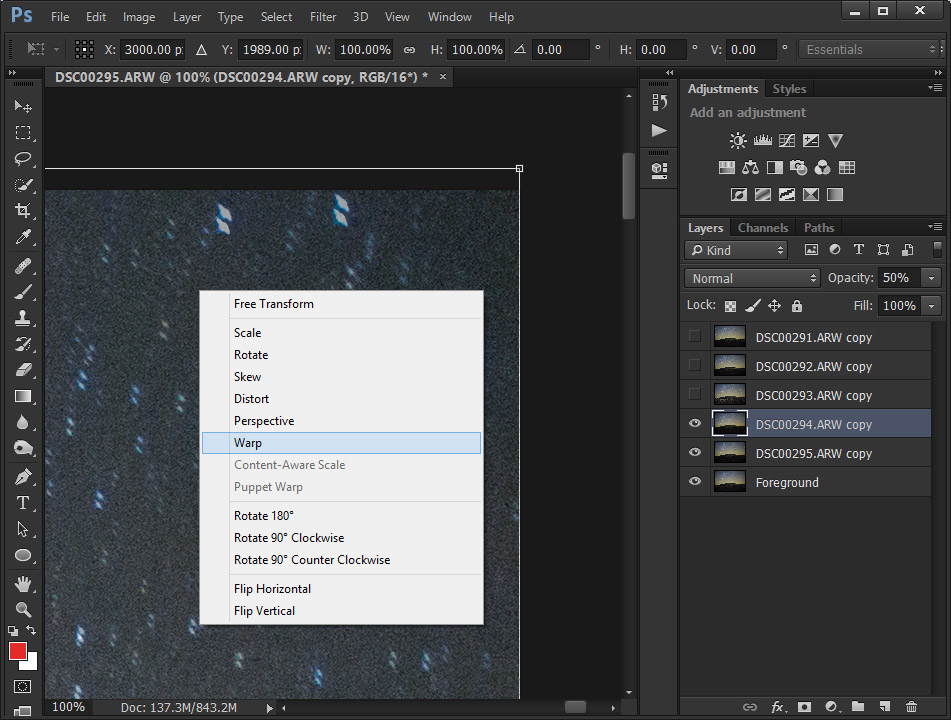
I create a copy of the five layers and merge it to use as the foreground. The other copy is going to be aligned. You are going to get star trails when you noise average the stack of images. To fix this, I use the Warp Transform tool (Edit > Transform > Warp) to align each layer manually. Photoshop’s Auto-Align tool will most likely work for photos of the Galactic Center.
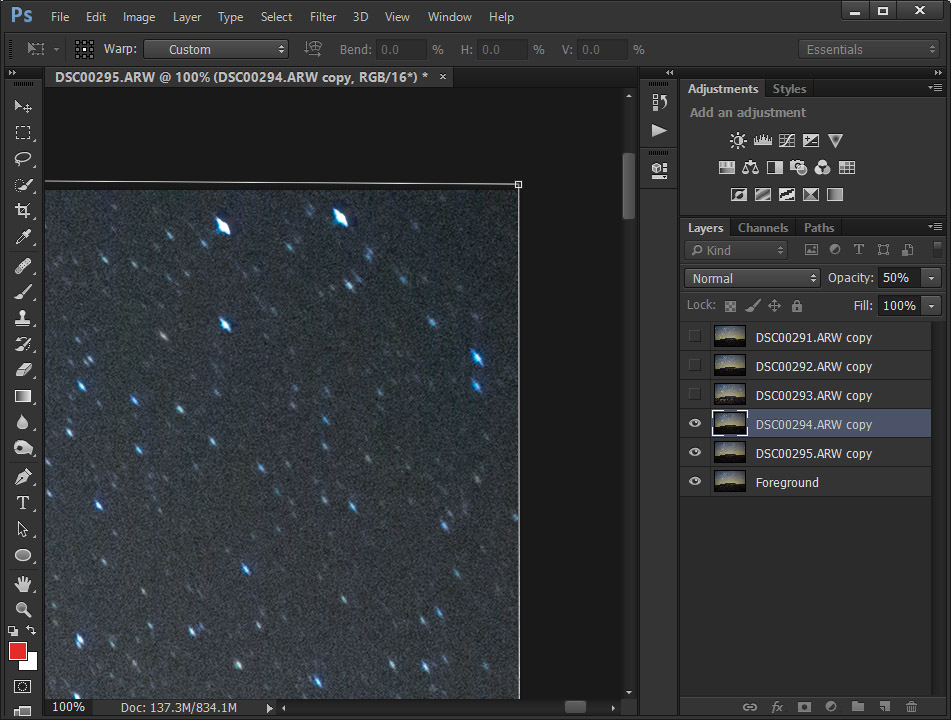
All I do now is look for stars that are unaligned with the layer below. Drag the part of the image that needs to be aligned so that the stars are pinpoints. I zoom in 100% and pan around to find any parts that are unaligned. Be patient to get good results with this step.
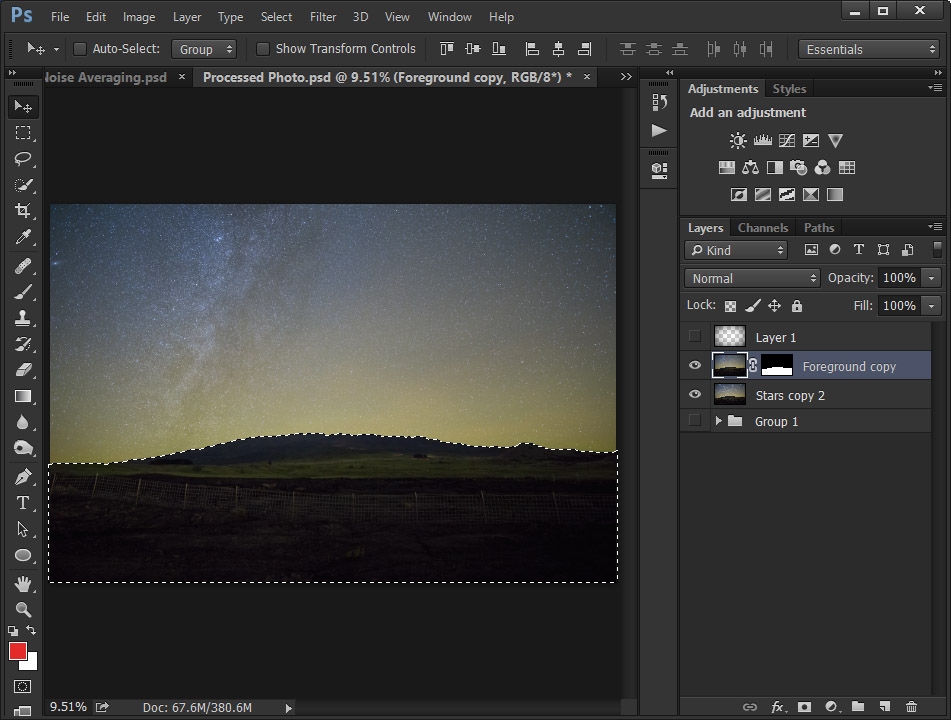
Lastly, I move the foreground layer to the top and use the quick selection tool and refine edge tool to select the mountain. Then I use the arrow keys to move the foreground up until the mountain on the sky layer is not showing.
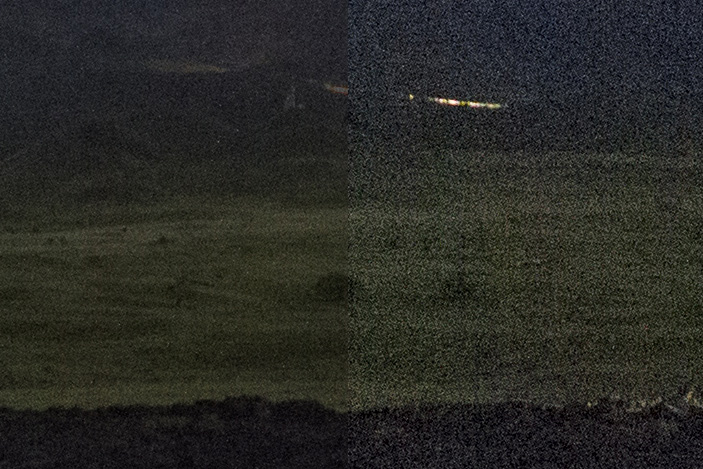
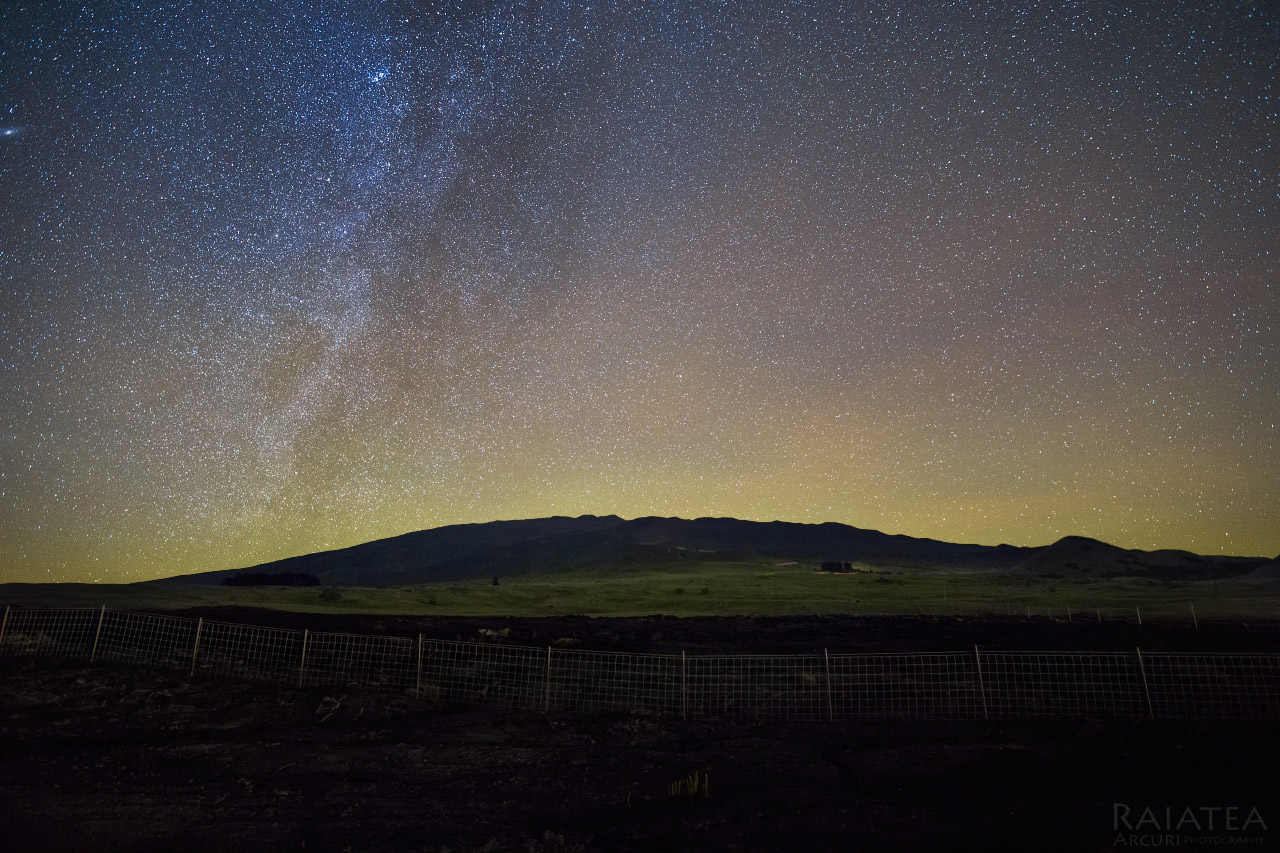
Noise averaged vs a single frame.
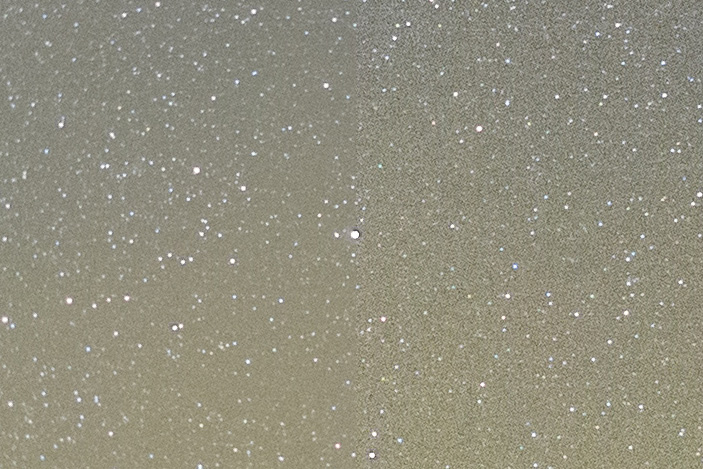
Noise averaged vs a single frame.
Check out my video for a detailed process of this photo: